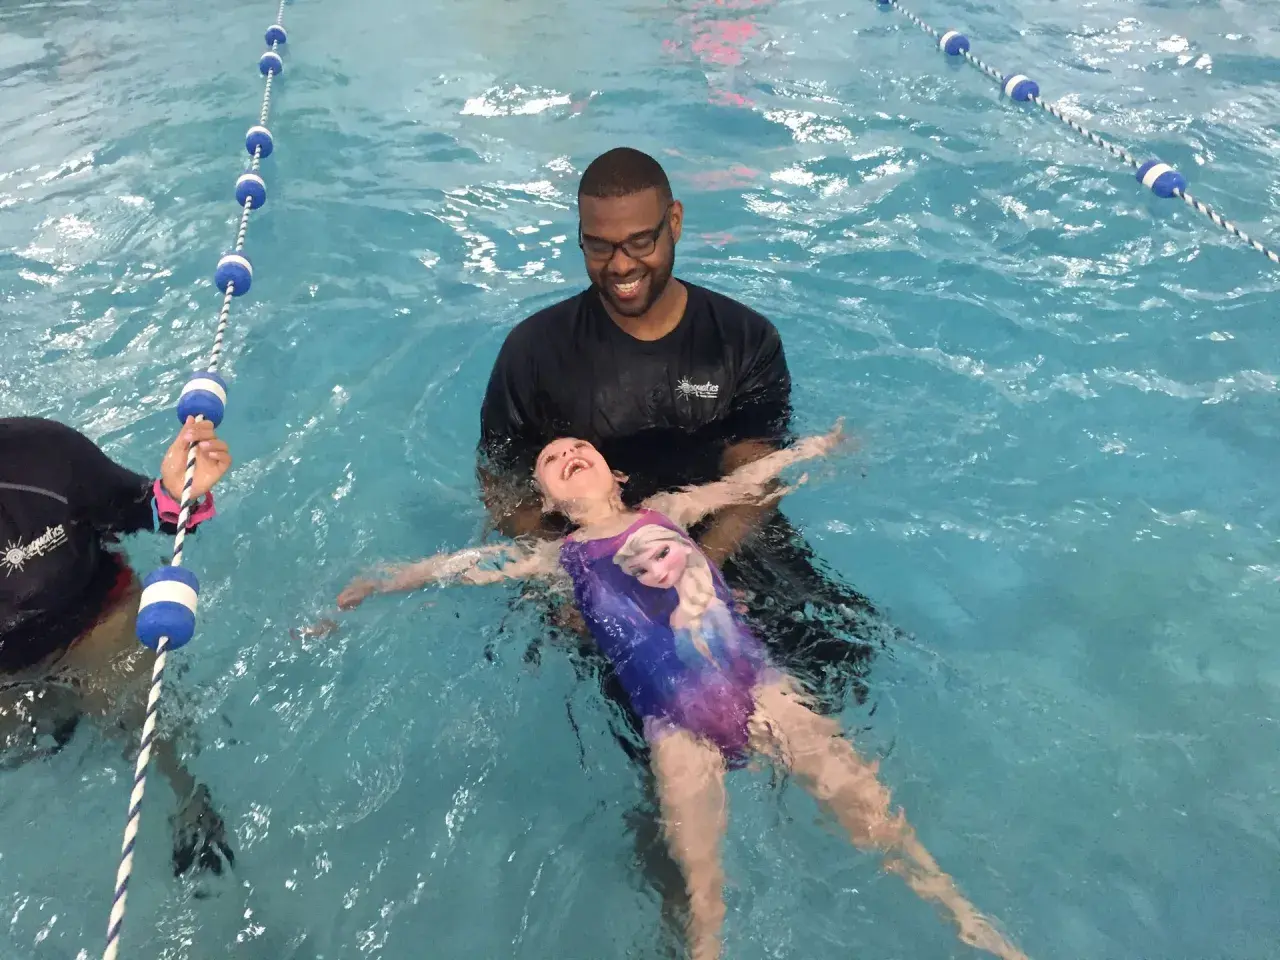
Key points to get a back float working
- Start in calm, shallow, supervised water where the learner can stand up easily.
- Keep the head back and the ears in the water; lifting the chin usually makes the hips sink.
- Use short attempts at first, then build up to longer holds only after the learner relaxes.
- Support lightly, then fade the support instead of holding the person up for too long.
- Teach a return to standing as part of the skill, not as an afterthought.
- Stop if panic, cold, or pain appears; forcing a float trains the wrong response.

What a stable back float actually looks like
A good back float is not a stiff pose. I want the learner to feel supported by the water, not held in a perfect shape. The head stays back, the ears are in the water, the face points up, and the neck stays loose. The body can be long and slightly open, like a relaxed star shape, with the arms and legs gently spread for balance.
The part many beginners miss is that the float is more about balance than buoyancy tricks. If the chin lifts too high, the hips usually drop. If the stomach and shoulders tighten, the body becomes heavy in the water. It also helps to explain that legs may sink a little and that is not automatically a failure. The goal is a calm, airway-clear position that can be held without effort.
That is why I treat the back float as a foundation skill, not a party trick. It supports recovery, rest, and later swimming patterns, so the first lesson should make the position feel understandable before it feels impressive. Once that picture is clear, the setup becomes much easier to get right.Set up the session so the learner can relax
I would always begin in a lifeguarded, warm pool where the learner can stand up within a second or two if they need to. Open water is the wrong place to introduce the skill, and cold water makes the learning harder because the body tightens and the breathing changes. The RNLI’s Float to Live advice is the right reference point here: head back, ears in, relax, breathe, and spread out if needed.
Before the first float, I usually check four things:
- The water is shallow enough for easy recovery.
- The learner understands how to stand back up.
- The teacher can support from beside or behind without crowding the face.
- The learner knows this is a short practice, not a test.
Equipment can help, but only if it is used carefully. A noodle or a light hand support under the upper back can give confidence in the first few tries, but I avoid propping the body up for too long because that hides the real balance point. For beginners, I usually prefer a simple, quiet environment and very brief holds. That creates a far better start than piling on gadgets or instructions. With the setting in place, the next job is to teach the movement in a sequence that feels safe.
The teaching sequence I would use
When I teach this skill, I try to move from control to freedom in small steps. The learner should always know how to stop, reset, and stand. Swim England’s early-stage standards use a flat back float and a return to standing as a useful benchmark, and that is exactly the kind of progress target I like because it keeps the skill practical.
-
Start with supported balance
Ask the learner to lean back while you support the upper back or shoulders lightly. Keep the support quiet and steady. The aim is not to lift them, but to show them that the water will take some of their weight. -
Add the head and breathing position
Tell them to look up, let the ears sink, and take slow breaths. I usually ask for one gentle inhale before the lean-back and then slow, relaxed breathing once they are floating. -
Release for a short count
Let go for 3 to 5 seconds at first. Short holds matter because they build success. If the learner can finish a short float without panic, they are far more likely to trust the next one. -
Build the time gradually
Once the body stops curling up, extend the hold to 8, 10, then 15 seconds. I would rather see five clean, calm attempts than one long struggle. -
Teach the exit back to standing
Tuck the knees, bring the feet down, and stand. This matters because a learner who knows how to exit the float feels safer and is less likely to panic halfway through.
This sequence works because it keeps the learner moving in one direction only: from tension to trust. Once they can get there reliably, the next improvement usually comes from the words you use while they are in the water.
The cues that make the position click
Good cueing is concise. The learner does not need a lecture while floating; they need one or two ideas they can feel immediately. I keep my language simple and repeat the same few phrases until the body starts to settle.
- “Look at the ceiling” keeps the head back without asking for an awkward chin lift.
- “Ears in, shoulders soft” reminds the learner to release the neck and upper body.
- “Make yourself long” helps the swimmer stretch out instead of curling into a ball.
- “Let the water hold you” is useful for anxious learners who keep trying to do too much.
- “Small, quiet breaths” shifts attention to breathing control instead of panic.
Common mistakes and the fastest fixes
Most failed back floats are not caused by poor buoyancy. They come from tension, bad head position, or too much coaching at once. I usually diagnose the issue by watching what happens the moment the learner starts to lean back.
| Mistake | What is usually happening | Fast fix |
|---|---|---|
| Lifting the chin | The neck tightens and the hips drop | Tell them to rest the head back and look up instead of forward |
| Holding the breath | The body stiffens and the learner feels out of control | Use a slow exhale and short, regular breaths |
| Arms and legs clamped together | The body becomes narrow and unstable | Ask for a relaxed star shape with limbs slightly apart |
| Kicking or sculling too hard | The learner tries to “save” the float instead of trusting it | Reduce the target time and let the water do more of the work |
| Too much teacher support | The learner never finds their own balance point | Use lighter touch and release sooner on the next attempt |
If I had to name the most common error, it would be the urge to stay rigid. A calm float is usually a softer float. Once those mistakes are under control, the skill can start feeding directly into more useful swimming patterns.
How to turn a back float into a real swimming skill
A back float becomes much more valuable when it is linked to movement. The next step is usually a gentle back glide from the wall, followed by a controlled return to standing. That bridge matters because it teaches the learner that they can move, stop, recover, and reset without losing calm.
From there, I like to build in this order:
- Back glide from a push-off to feel the body line on the surface.
- Short back travel for 3 to 5 metres with relaxed breathing.
- Roll from front to back and back to front so the learner can change position without panic.
- Elementary backstroke or supported back kicking once the float and glide feel steady.
That progression keeps the learner moving towards actual swimming competence instead of leaving them with a disconnected balance drill. It also fits the way many beginner programmes teach recovery and orientation in water. For me, the best result is not just that someone can float, but that they can recover, move, and keep thinking clearly while they are on their back.
What I would keep repeating in the pool
If I were teaching this skill tomorrow, I would keep the message short: lean back, relax the neck, spread out, breathe, and stand up when you need to. That is the whole lesson in a usable form. Everything else is detail that supports those five ideas.
I would also be strict about pace. The learner should leave each session feeling a little more in control, not a little more worn out. When that happens, the back float stops being a stressful drill and becomes a reliable skill they can use for swimming lessons, for resting between efforts, and for staying calm if water ever becomes difficult.
The best teaching is simple, patient, and repeatable. If the person in front of you can float for a few seconds with a quiet breath and a clear way to stand up again, you are already teaching the right skill in the right way.