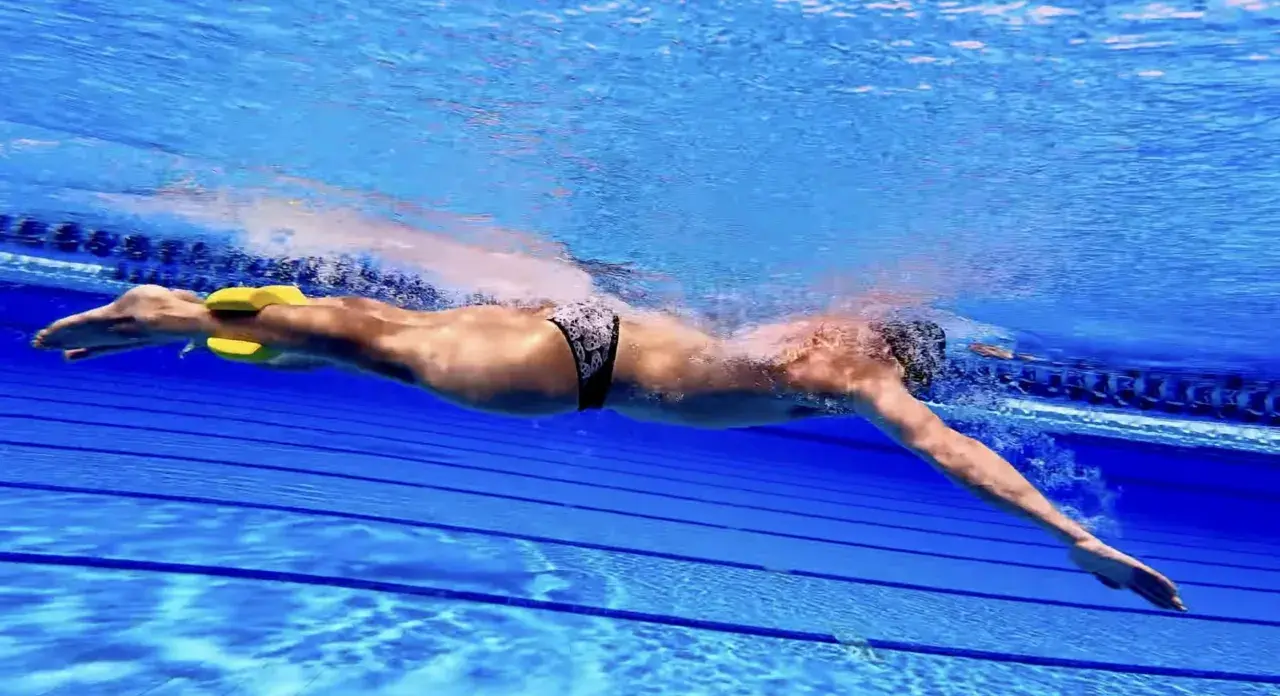
What a good pull buoy set should achieve
- Lift the hips enough to create a longer, flatter body line without forcing a lower-back arch.
- Shift attention to the arms so you can feel the catch, pull path, and rotation more clearly.
- Keep the work purposeful with short, focused repeats rather than endless yardage.
- Use it as feedback and check whether the stroke still holds together once the buoy comes out.
- Stop before form breaks if your shoulders, neck, or lower back start to complain.
What a pull buoy actually changes in your stroke
I like to think of a pull buoy as a body-position tool first and a strength tool second. By taking the kick out of the equation, it reduces the number of things your body is trying to do at once, so you can feel how your front crawl really behaves when the legs are no longer rescuing a sinking line.
That matters because many swimmers assume they need more power when the real issue is drag. A good buoy set can show you whether your hips stay high, whether your head stays quiet, and whether your arms are actually moving water instead of just churning it. Used well, it gives cleaner feedback than a hard swim ever will. That brings us to the part most swimmers get wrong first: where the buoy should sit and how much support you actually want from it.

How to position it for clean, useful support
The safest default is simple: place the buoy high between your thighs, then hold it just firmly enough that it does not drift or twist. You do not need to squeeze it like a vice. In fact, over-gripping tends to tighten the hips and makes the stroke feel artificially rigid.
| Placement | What it feels like | Best use |
|---|---|---|
| Between the thighs | Most stable, with enough lift to support the hips | Technique work, recovery swims, longer pull repeats |
| Between the ankles | Much less support and more demand on body line | Shorter, more advanced pull sets when your position is already solid |
I rarely start anyone straight at the ankles unless their body line is already reliable. If the buoy keeps sliding down, or if your knees start scissoring around it, move it higher and reset. The goal is support without cheating, because the next step is turning that setup into a useful training block rather than a floaty warm-up.
How to build a pull set that actually helps
I prefer pull-buoy work in small, deliberate blocks. If the set is too long, swimmers usually drift into lazy tempo or start muscling the water just to survive the repeat. Shorter repeats keep the stroke honest and make the feedback more usable.
- Technique set: 8 x 50m pull on 15 seconds rest, with a quiet head and a consistent catch.
- Endurance set: 4 x 100m pull on 20 seconds rest, holding stroke count and rhythm from first repeat to last.
- Power-biased set: 6 x 25m pull with paddles only if your shoulders are ready and the stroke stays clean.
If you train in a 25m pool, that usually means two or four lengths per repeat, which is enough to build focus without turning the session into mindless mileage. I would also keep a normal swim block soon after the buoy work, because the transfer is better when your body has to reproduce the same line without the extra support. The key is knowing what good feels like in the water, not just what hard feels like on the stopwatch.
What to feel in the water when it is working
The strongest sign that a pull buoy set is doing its job is not speed. It is control. The stroke should feel longer, quieter, and more connected from hand entry to exit. If it only feels easier, you are probably leaning on the buoy too much.
- Hips near the surface without a hard arch through the lower back.
- Head steady with the eyes down, so the body line does not fold at the neck.
- Catch pressure early rather than a rushed, slippery pull.
- Rotation driven by the torso instead of a hidden kick or frantic shoulder twist.
- Breathing that stays calm rather than lifting the head to find air.
When those cues are present, the buoy is giving you a clear picture of your stroke rather than masking it. If they disappear, it is usually the first sign that the set has gone past the useful point and is now just tiring you out.
Common mistakes that waste the drill
The biggest mistake is using the buoy as a shortcut to feel fast. That can be flattering for one length and unhelpful for the rest of the session. I see the same errors over and over, and most of them come from trying to make the tool do more work than it should.
- Clamping the buoy with the knees, which tightens the body and can upset the kick timing when you swim without it.
- Over-arching the lower back to fake better body position instead of holding the core in a neutral line.
- Dropping the elbow, which turns a pull set into a shoulder-heavy grind rather than a clean catch drill.
- Adding paddles too early, especially when the stroke is not stable enough to handle the extra load.
- Doing every session with a buoy, which can make whole-stroke swimming feel unfamiliar when you remove it.
If your pull set looks strong but your unassisted swimming gets worse, the aid has probably become a crutch. That is why I keep one eye on the session structure too, not just the drill itself.
Where it fits in a weekly swim programme
For most swimmers, one to two buoy sessions a week is enough. More than that can be useful in a focused block, but only if the rest of your swimming still includes normal kick work and full-stroke repeats. I would not turn every pool visit into a pull session unless the plan is very specific and time-limited.
- Use it in technique weeks when the main goal is body position and stroke feel.
- Use it when kicking is distracting the stroke and you want to isolate the upper body.
- Use it for recovery swims if you need lower leg load without stopping altogether.
- Leave it out when race rhythm matters most, because whole-stroke timing still has to be trained directly.
- Keep it light if your shoulders are irritated, and stop if pain increases rather than simply feeling like effort.
It is also less central in strokes where the kick is a core part of the movement, so I would treat it as a targeted front crawl and backstroke aid rather than a universal fix. That leaves one final question worth answering: what actually makes the benefit carry over once the buoy is gone?
The small habits that make buoy work transfer
The transfer comes from two habits: keeping the repeats short enough to stay precise, and following them with unassisted swimming while the body still remembers the shape of the stroke. If I had to give one rule, it would be this: never let the buoy do so much that the next swim becomes a reset from scratch.
A simple pattern works well: easy swim in, a focused pull block, then a few lengths of normal front crawl at the same smooth effort. If the stroke still feels organised without the buoy, the session has done its job. That is usually the clearest sign that you have not just trained the aid, but improved the swim behind it.