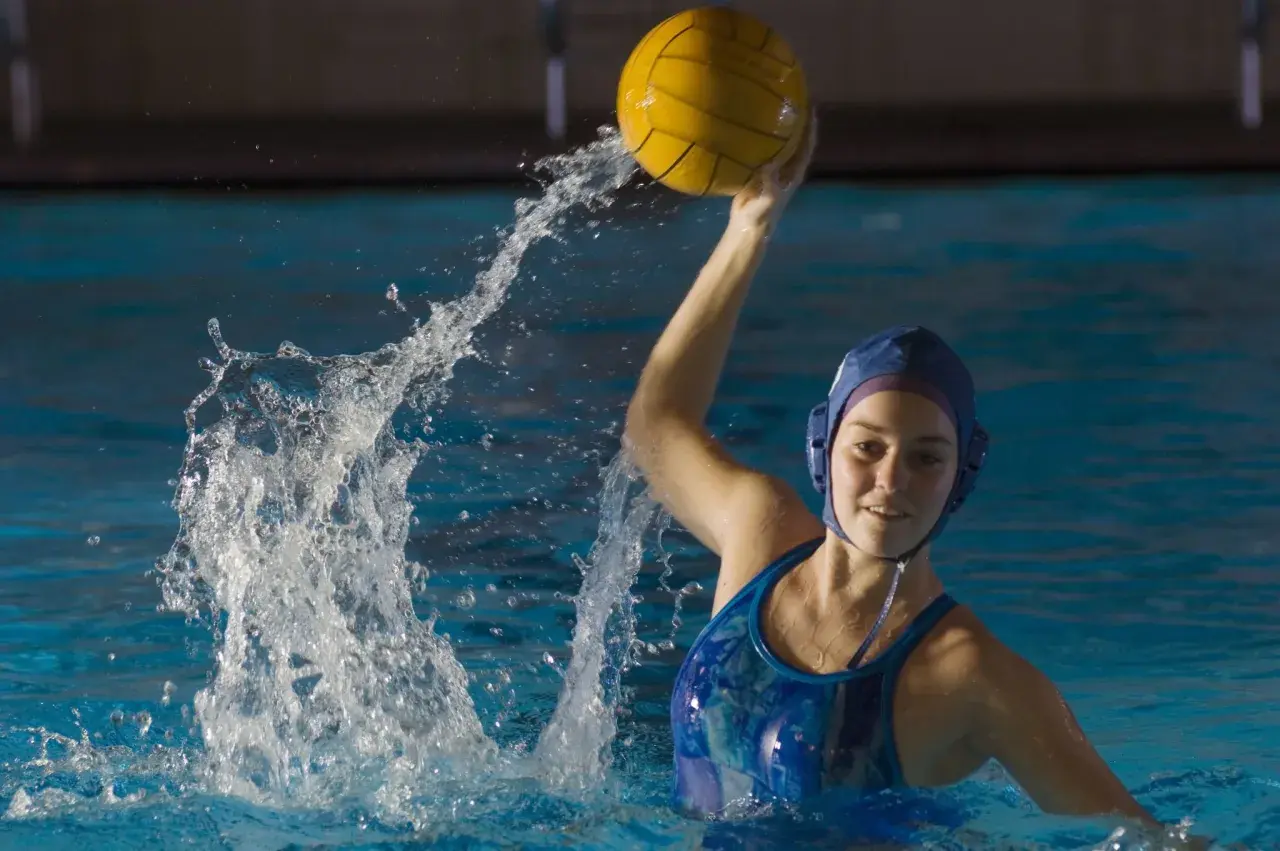
The fastest way to stay high, balanced, and ready in the water
- The eggbeater kick is the standard vertical support pattern in water polo because it keeps the upper body stable while freeing the arms.
- Good technique comes from the hips and a controlled circular leg path, not from frantic bicycle kicks.
- Hands still matter: light sculling can add balance and help you stay centered when pressure increases.
- Beginners should train short, clean holds first, then add time and resistance only after the position stays consistent.
- Hip and groin mobility are not optional if you want height without irritating the knees.
What the eggbeater kick actually does and why it works
The first mistake I see is treating this skill like ordinary treading water. It is not. The eggbeater creates a continuous platform under your body, so you do not sink between kicks the way you do with a simple flutter or scissor motion. That matters in water polo because your next action is rarely “just stay afloat.” You need to pass, shoot, block, wrestle for position, or recover from contact without losing height.
I think of it as vertical support with mobility. You are not trying to swim forward; you are trying to stay available. That distinction is huge. A player who can keep the chest high and the head stable can see the pool longer, release the ball faster, and absorb contact without collapsing. Divers will recognize the same demand for body control, but in water polo the position has to repeat over and over, under fatigue, and usually with somebody leaning on you.
| Technique | What it feels like | Best use | Main drawback |
|---|---|---|---|
| Basic tread water | Up-and-down support with simple leg motion | Casual swimming or survival | Bobbing, slower reactions, more fatigue |
| Eggbeater kick | Continuous alternating leg drive with a steady torso | Water polo and goalkeeping | Needs mobility and technical repetition |
| Eggbeater plus sculling | Leg support with small hand sweeps for balance | Blocking, passing, and contact situations | Can become inefficient if the hands do too much work |
Once that difference clicks, the mechanics become much easier to learn. The next step is building the movement pattern without fighting the water.

How to build the motion without fighting the water
I coach this in three parts: body position, leg timing, and hand support. If one of those breaks down, the whole thing feels harder than it should.
Set the body first
Start tall in deep water with your chest lifted and your hips under you, not sitting back like you are trying to float on a chair. Think “stacked” rather than “arched.” The core should be firm enough to keep the torso from folding, but not so rigid that your legs lose freedom.
Let each leg work on its own
Each leg moves in an alternating circular path, similar to a one-legged breaststroke kick. One leg recovers while the other drives. The useful part of the kick is the sweep: the lower leg and foot turn outward, then press water down and slightly inward to create lift. The motion is compact, not huge. If you are making wide splashes, you are usually wasting effort.
Read Also: Diving Scores Explained - Master How Judges Score & Read Results
Use the hands as stabilizers, not crutches
Small sculling movements just below the surface can add balance. Sculling means a short figure-eight or side-to-side hand action that helps you feel the water and fine-tune position. It should support the legs, not replace them. When I teach this, I want the hands to calm the body, not rescue the body.
- Begin in deep water with your head comfortably above the surface.
- Bend one knee outward while the other leg stays active.
- Sweep the lower leg and foot in a circular path to press water downward.
- Alternate the legs so there is no dead pause between kicks.
- Add light sculling only after the lower body is producing enough lift on its own.
The goal is not speed for its own sake. The goal is a steady platform that stays usable when you are tired, bumped, or reaching for the ball. That is where most technique breaks down, which is why the next section matters.
The mistakes that make the position collapse
Most bad eggbeater work looks energetic but fails the basic test: it cannot hold the player high for long. The pattern may seem busy, but if the chest keeps dropping and the legs burn out in seconds, the mechanics are off.
| Mistake | What it causes | What to change |
|---|---|---|
| Too much bicycle motion | Bobbing, wasted energy, poor balance | Use a cleaner outward-and-downward sweep |
| Trying to kick from the knees alone | Weak lift and extra knee stress | Let the hips and whole leg drive the motion |
| Huge splashy circles | Fast fatigue without extra height | Shorten the range and keep the motion compact |
| Locked ankles and stiff feet | Poor water catch | Keep the feet relaxed and turned out naturally |
| Arms doing all the work | Tiring upper body, unstable torso | Let the hands assist, not carry the position |
| Chasing height before rhythm | Technique falls apart under contact | Build a stable rhythm first, then increase pressure |
One coaching point I keep returning to, and one that matches how USA Water Polo talks about the skill, is that mobility and technique matter as much as raw strength. If your hips are tight, your range shortens; if your range shortens, the water you grab shrinks; if the water you grab shrinks, your lift drops. That chain is simple, and it is why good treading water starts long before you enter the pool. The best fix is a smarter progression, which is what I use in training.
Drills that make the skill usable in games
I prefer short, specific drills over endless vertical holds. Long sets can build stamina, but they also let sloppy habits settle in. Technique work should feel repeatable and honest.
- Wall-supported pattern - Stand or hover near the wall, hold it lightly for balance, and practice one leg at a time in the correct circular path. Do 2 sets of 8 to 10 controlled reps per side.
- Seated pool-edge drill - Sit on the pool edge with your feet in the water and alternate the kick while watching your legs. This makes feedback immediate. Use 3 rounds of 20 to 30 seconds.
- Vertical hold intervals - Tread in deep water for 6 rounds of 15 to 20 seconds with 20 to 30 seconds of rest. Stop the set if your head starts bobbing or the knees get sloppy.
- Ball-overhead hold - Once the kick is stable, hold a ball overhead for 10 to 15 seconds. This simulates game posture and exposes weak support quickly.
- Light contact drill - With a partner, keep a vertical hold while absorbing mild shoulder or forearm contact. The point is control, not winning a wrestling match.
If you want a simple session template, use 10 minutes of skill work before your main swim set. That is enough to focus the nervous system without turning the drill into a full conditioning test. Short fins can help rhythm in some warm-ups, but I would not rely on them to teach the movement. They can hide weak mechanics if you use them too early.
How it shows up in real water polo play
The kick matters most when the game gets crowded. In open water, almost any competent swimmer can stay alive. In water polo, the player who controls vertical position under pressure has a real advantage.
| Game situation | Why vertical support matters | What good technique changes |
|---|---|---|
| Center or 2-meter play | Contact is constant and the ball arrives fast | You can seal space and receive without sinking |
| Goalkeeping | Explosive rise and fast reset are essential | You can block higher shots and recover sooner |
| Perimeter defense | You need balance while reading the pass | You stay high enough to contest and recover |
| Passing under pressure | The release window is short | Your shoulders stay free and the pass comes off faster |
What I would focus on in the first two weeks
If I were coaching a beginner, I would keep the first two weeks boring on purpose. The goal is not flashy height. The goal is repeatable control. I would build around three priorities: mobility, clean mechanics, and short intervals that do not fall apart.
- Mobility before volume - Spend 5 to 8 minutes on hip and groin mobility before water work. If the hips open better, the kick usually gets cleaner almost immediately.
- Short holds first - Start with 6 x 15-second vertical holds and 30 seconds of rest. If the shape stays clean, move to 4 x 20 seconds before adding anything harder.
- Light hand support only after the legs are steady - Add sculling after the lower body is producing enough lift to keep the torso calm.
- Clean exits from every set - End each repetition with the same posture you started with. Do not let fatigue teach bad habits.
If your knees ache, your hips feel blocked, or your chest keeps dropping, shorten the range and get coaching before you add more work. That is the practical line I draw every time: technique first, then load, then game pressure. Once that base is in place, the rest of water polo becomes much easier to manage because you are no longer spending all your energy just trying to stay up.